Herringbone Tile Patterns: Single vs Double, Backsplash & Floor Uses
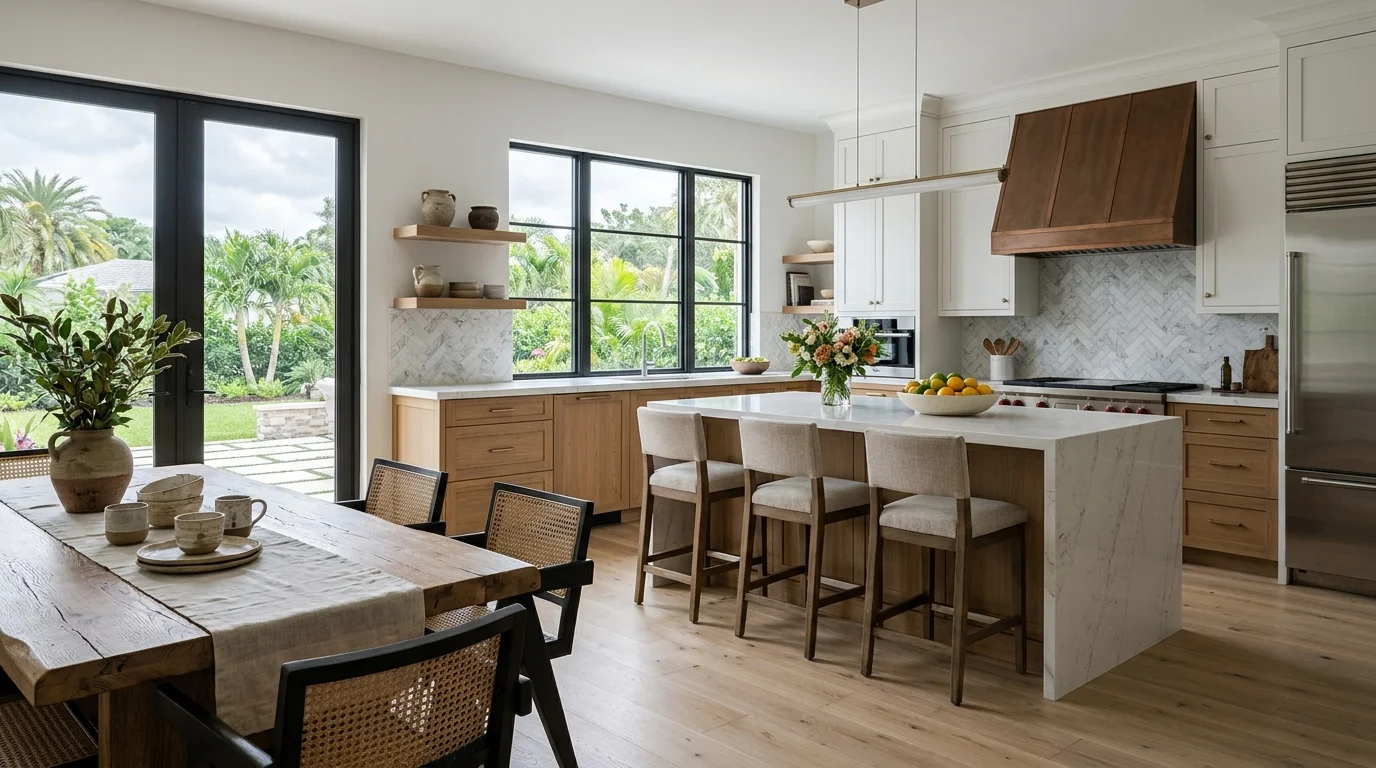
Herringbone tile is one of the most requested patterns we see at South Florida Kitchen & Bath Design. Homeowners in Boca Raton, Delray Beach, Wellington, and Jupiter ask about it constantly, and for good reason. The pattern adds movement and structure to any surface without requiring exotic materials. You can run it on a backsplash with a simple 3x6 subway tile, or lay it across a bathroom floor in large-format porcelain, and both look intentional and finished. This guide covers how herringbone works, the difference between single and double herringbone, where to use each, and what it actually costs in the Palm Beach County market.
What Is Herringbone Tile?
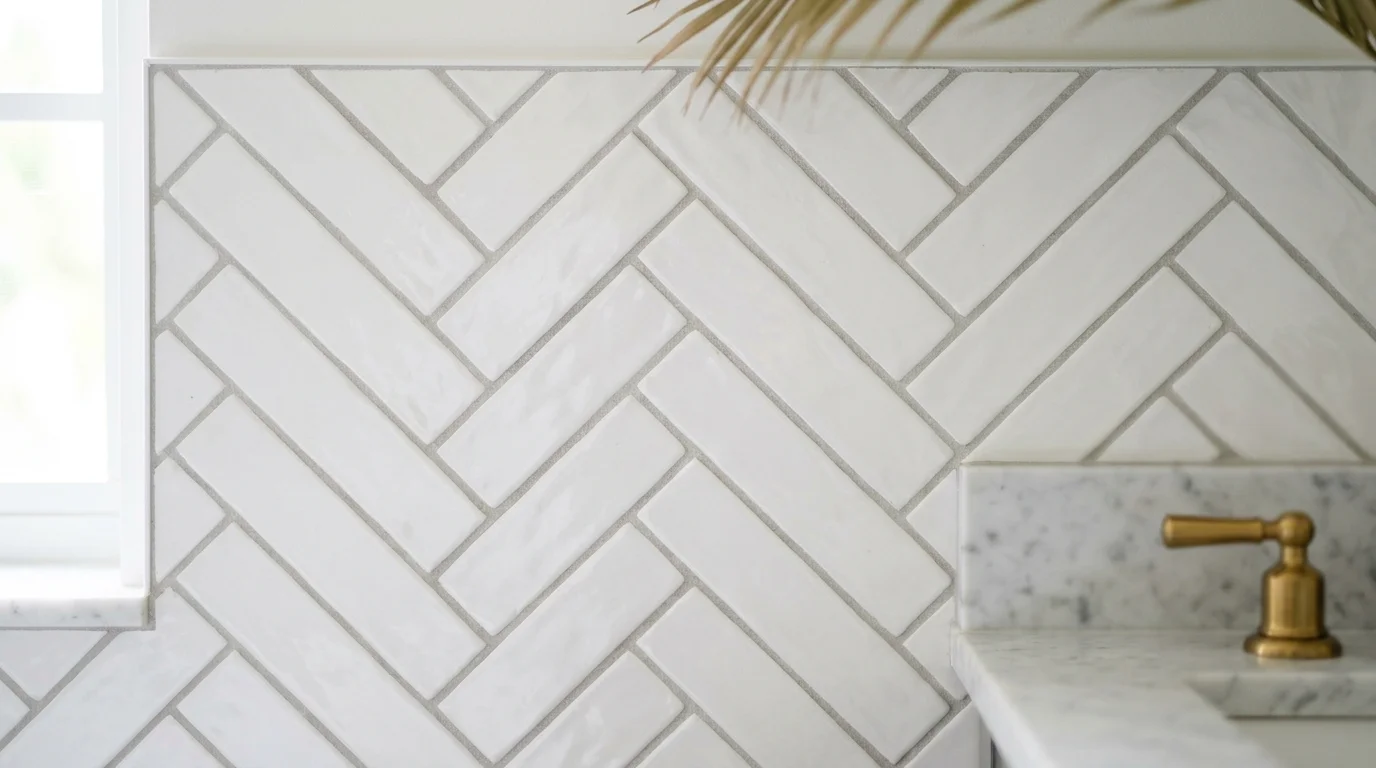
Herringbone is a rectangular tile laid at 45-degree angles so each piece points in alternating directions, creating a continuous V-shaped or zigzag pattern across the surface. The name comes from the skeleton of a herring fish, and the visual logic is the same: bones branching left and right from a central spine.
The pattern has been around for centuries. Roman roads used it in stone. Victorian-era floors used it in brick. Today it shows up in kitchens, bathrooms, mudrooms, and outdoor spaces across South Florida. What keeps it relevant is that it does something plain grid patterns cannot: it creates diagonal lines that make a space feel longer, wider, or more dynamic depending on how the layout is oriented.
Any rectangular tile works in herringbone. The most popular sizes we install are 2x4, 3x6, 2x8, and 4x12. Longer, more slender tiles emphasize the zigzag. Wider tiles with shorter proportions create a subtler effect. Material matters too. Glossy white subway tile in herringbone reads as classic and clean. Matte cement-look porcelain in herringbone reads as modern and grounded. Zellige tile in herringbone looks textured and handmade, which works well in Mediterranean and coastal interiors that are common throughout Palm Beach County.
Grout color shapes the whole look. A matching grout softens the pattern and lets the tile material do the talking. A contrasting grout, like charcoal against white tile, makes every joint visible and turns the herringbone geometry into the star of the room. We cover that tradeoff in detail in our grout color guide.
Single vs Double Herringbone
This is the question that trips up most homeowners during the design phase. Single and double herringbone look similar at first glance, but they behave very differently on a wall or floor.
Single herringbone is the standard pattern. Each tile is placed individually at a 45-degree angle, alternating direction with every piece. The result is the classic clean zigzag. It is the easier of the two to install, which matters for cost, and it works at virtually any scale, from a narrow backsplash to a large shower floor.
Double herringbone pairs two tiles side by side before reversing direction. Instead of a single tile forming each leg of the V, you get two tiles running parallel, then two more running in the opposite direction. The visual effect is bolder. The zigzag units are thicker, so the eye reads the pattern as larger and more geometric. Double herringbone tends to suit wider, more open surfaces: master bathroom floors, large shower walls, kitchen floors in open-plan homes. On a narrow 18-inch backsplash strip, double herringbone can feel cramped because you do not have enough vertical space to complete a full repeat of the pattern.
Our opinion: for backsplashes, single herringbone almost always wins. The tiles are smaller and the surface is taller than it is wide, so single herringbone has room to breathe and the pattern reads clearly. For floors in a master bath or primary shower, double herringbone is worth the extra labor if the room is large enough. It has a presence that single herringbone cannot match at floor scale. For small bathrooms, stick with single.
Tile size interacts with this decision. If you are using 2x4 tile in double herringbone on a bathroom floor, the individual tiles are small enough that the paired units still look refined. If you try double herringbone with 4x12 tiles, each pair becomes an 8x12 visual block, and the pattern can read as chunky rather than elegant. We have seen that mistake enough times in Delray Beach and Wellington remodels that we steer most clients toward single herringbone when the tile format is on the larger side.
Herringbone as a Backsplash
A herringbone backsplash is one of the highest-impact, lowest-risk moves in a kitchen remodel. The surface area is relatively small, the tile cost is contained, and the pattern draws the eye in a way that a straight-stack or brick-offset layout simply does not.
The most common approach we install is a full-height herringbone backsplash from counter to upper cabinet using 3x6 or 2x8 subway tile. White glossy in herringbone behind white shaker cabinets adds texture without competing with the cabinetry. If the cabinets are a color, say navy or sage green, a soft warm white or greige tile in herringbone creates a backdrop that feels layered rather than busy. For more on pairing tile with cabinetry color, see our guide to backsplash ideas with white cabinets.
Herringbone also works well as an accent in a specific zone. Many of the kitchens we design in Boca Raton and Jupiter use a slab backsplash material behind the range hood and herringbone tile on the perimeter walls. That approach gives you a focal point without running the more labor-intensive herringbone installation across every inch of wall. It is a smart way to manage budget without sacrificing the design effect.
Tile choice for backsplashes should account for cleaning. A polished or glossy surface wipes down easily, which matters near a cooktop. A matte or textured tile is beautiful but can trap grease in the texture if the surface is near heavy cooking. We recommend limiting highly textured tiles like zellige or handmade ceramics to the perimeter walls rather than directly behind the range if the kitchen sees daily cooking. For a broader look at how to approach the decision, our article on how to choose a kitchen backsplash covers material, scale, and pattern considerations together.
One thing that affects backsplash installation cost more than most homeowners expect: outlets. A standard kitchen backsplash has multiple electrical outlets that need to be tiled around. Herringbone requires more cuts than a straight-stack pattern because every tile at the perimeter must be cut at an angle. That takes more time, and time is labor cost. Expect a herringbone backsplash to run 15-25% more in labor than the same tile laid in a straight stack.
Herringbone on the Floor
Herringbone floors have been a fixture in European design for centuries, and they translate well to South Florida bathrooms and kitchens. The pattern works in porcelain, ceramic, natural stone, and even wood-look tile. Each material combination produces a different feel.
In bathrooms, herringbone is especially effective in walk-in showers and on bathroom floors. A 2x4 or 3x6 porcelain tile in herringbone on a shower floor gives you natural slip resistance from the increased number of grout joints, which is relevant in South Florida where wet floors are a year-round reality. For larger bathroom floor areas, 4x8 or 4x12 tiles in herringbone read as more architectural. We see this frequently in master baths in Wellington and Palm Beach Gardens, where the homeowner wants a floor that looks custom without committing to natural stone maintenance. For more bathroom floor tile inspiration, our bathroom floor tile ideas for Palm Beach County homes breaks down material and pattern options in detail.
Kitchen floors in herringbone are less common than backsplash applications, but they work. The pattern creates a visual anchor in open-plan spaces and pairs well with clean-line cabinetry. The practical consideration is grout maintenance. A kitchen floor takes significant foot traffic and spills, and herringbone has more grout lines than a large-format straight-laid tile. We recommend a mid-tone grout (not white, not black) and a penetrating sealer applied at installation and again every 12-18 months. If low maintenance is the top priority, a large-format tile in a straight lay or slight offset is a more practical choice for kitchen floors.
Wood-look porcelain in herringbone deserves a mention. It is one of the most popular combinations we install in Delray Beach and Boca Raton condos. The planks are typically 4x24 or 6x24, and when laid in herringbone, the wood grain and the geometric pattern work together to create a floor that reads as warm and sophisticated at the same time. It is a strong alternative to actual hardwood in a coastal Florida climate where humidity swings are significant. For a full breakdown of how wood-look and other options hold up in Florida kitchens, see our article on kitchen flooring options pros and cons.
Shower floors in herringbone tile must be installed with proper waterproofing underneath. The substrate and membrane work is handled by your general contractor before our crew sets the tile. That sequence matters and should be confirmed before tile installation begins. For South Florida specifically, where humidity is a constant factor, do not skip this step. The Florida Building Code sets minimum standards for shower waterproofing, and your GC should be working to those standards regardless of the tile pattern chosen.
Cost Guide
Herringbone tile costs more to install than a straight-stack pattern because of the additional cuts and layout time. Here is what projects typically run in the Palm Beach County market. These are installed costs including tile material, labor, and grout. They do not include any demolition, waterproofing membrane, or structural work, which are your GC's scope.
A typical kitchen backsplash runs 30-50 square feet. At $18-$35 per square foot, that is a $540-$1,750 range for a porcelain subway herringbone backsplash, installed. A primary bathroom floor of 60-80 square feet in double herringbone porcelain lands between $1,500 and $4,000. Natural stone herringbone on any surface adds significant cost because the material itself is more expensive and stone requires more careful cutting and sealing after installation.
Labor is the bigger variable in this market. Our crews in Palm Beach County work with tile setters who know herringbone layout well, but the complexity of the pattern and the number of cuts on a given job affect the final number. Tight spaces with many outlets or fixtures, like a galley kitchen backsplash with four outlets and an undermount range hood, take more time than an open wall. Get a detailed scope in writing before work begins. If you are comparing bids, our article on how to read a contractor quote explains what to look for line by line.
South Florida Considerations
Palm Beach County is not a neutral environment for tile work. Heat, humidity, and salt air affect material performance, and the design preferences here differ from what you see in national trend reports. Here is what actually matters when planning a herringbone tile project in this market.
Moisture movement is real. Florida humidity causes slight expansion and contraction in tile substrates year-round. This is one reason we strongly recommend rectified porcelain tile for herringbone floor installations. Rectified tiles are cut to precise dimensions after firing, which allows for tighter, more consistent grout joints. That consistency matters in herringbone especially, because any variation in tile size becomes visible when the pieces are set at angles. Non-rectified tile with wider grout joints can still look good in herringbone, but the execution requires a more experienced setter to stay consistent.
Tile orientation relative to natural light matters more in South Florida than in northern markets. Our strong, low-angle morning and afternoon sun creates dramatic raking light across horizontal surfaces. That light shows grout lines and tile texture more clearly than diffuse northern light does. In east-facing kitchens in Boca Raton, a glossy herringbone backsplash will catch that morning sun beautifully. In west-facing bathrooms in Wellington, a matte herringbone floor will glow in the afternoon. Think about which direction your natural light comes from before choosing tile finish.
Coastal homes near Jupiter and Juno Beach deal with salt air that accelerates corrosion on metal fixtures and grout in unsealed joints. Use a quality penetrating grout sealer on any herringbone floor or shower application, and reapply it annually. This is not optional in a coastal environment. It is straightforward maintenance that prevents staining and mold growth in the grout joints.
HOA and ARB approvals are a reality for many homes in gated communities throughout Palm Beach County. If you are remodeling a kitchen or bathroom in a community with architectural review, your general contractor handles the submission process. We supply detailed design drawings and material samples to support that package, but the GC submits and coordinates with the building department. Interior tile pattern changes typically do not require permits on their own, but if the project involves moving a sink, changing electrical service, or opening walls, your GC will determine what permits apply based on scope.
For homeowners planning a full bathroom remodel that includes herringbone tile, it helps to understand the full project budget before committing to tile selections. Our bathroom remodel cost guide for Palm Beach County breaks down what full bathroom projects run in this market, including tile, fixtures, and labor. For shower-specific projects, our bathroom shower tile ideas for South Florida homes covers pattern and material combinations that hold up well in Florida's climate.
One last point: herringbone tile is not a trendy pattern that will look dated in five years. It has been used in serious architecture for centuries. The specific tile material and color you choose will follow trends, but the pattern itself is durable as a design decision. That matters for resale value, particularly in Palm Beach County's competitive real estate market where buyers pay attention to finish quality. A well-executed herringbone backsplash or bathroom floor reads as a premium detail, not a gimmick. We have seen it make a real difference in how buyers perceive a kitchen or bathroom during a home showing.